The Ultimate Guide To Highlighting With Eyeshadows
There’s this magical little trick in the makeup world known as highlighting. Why is highlighting so magical? This optical illusion has the ability to draw attention to eyes making them brighter, appear bigger, lighter, more awake, lifted and gives you an overall more youthful look using the following principles:
- To pull something forward, make it lighter
- To push something back, make it darker

Ultimate Face Highlighting Guide with Allergen Free Eyeshadows
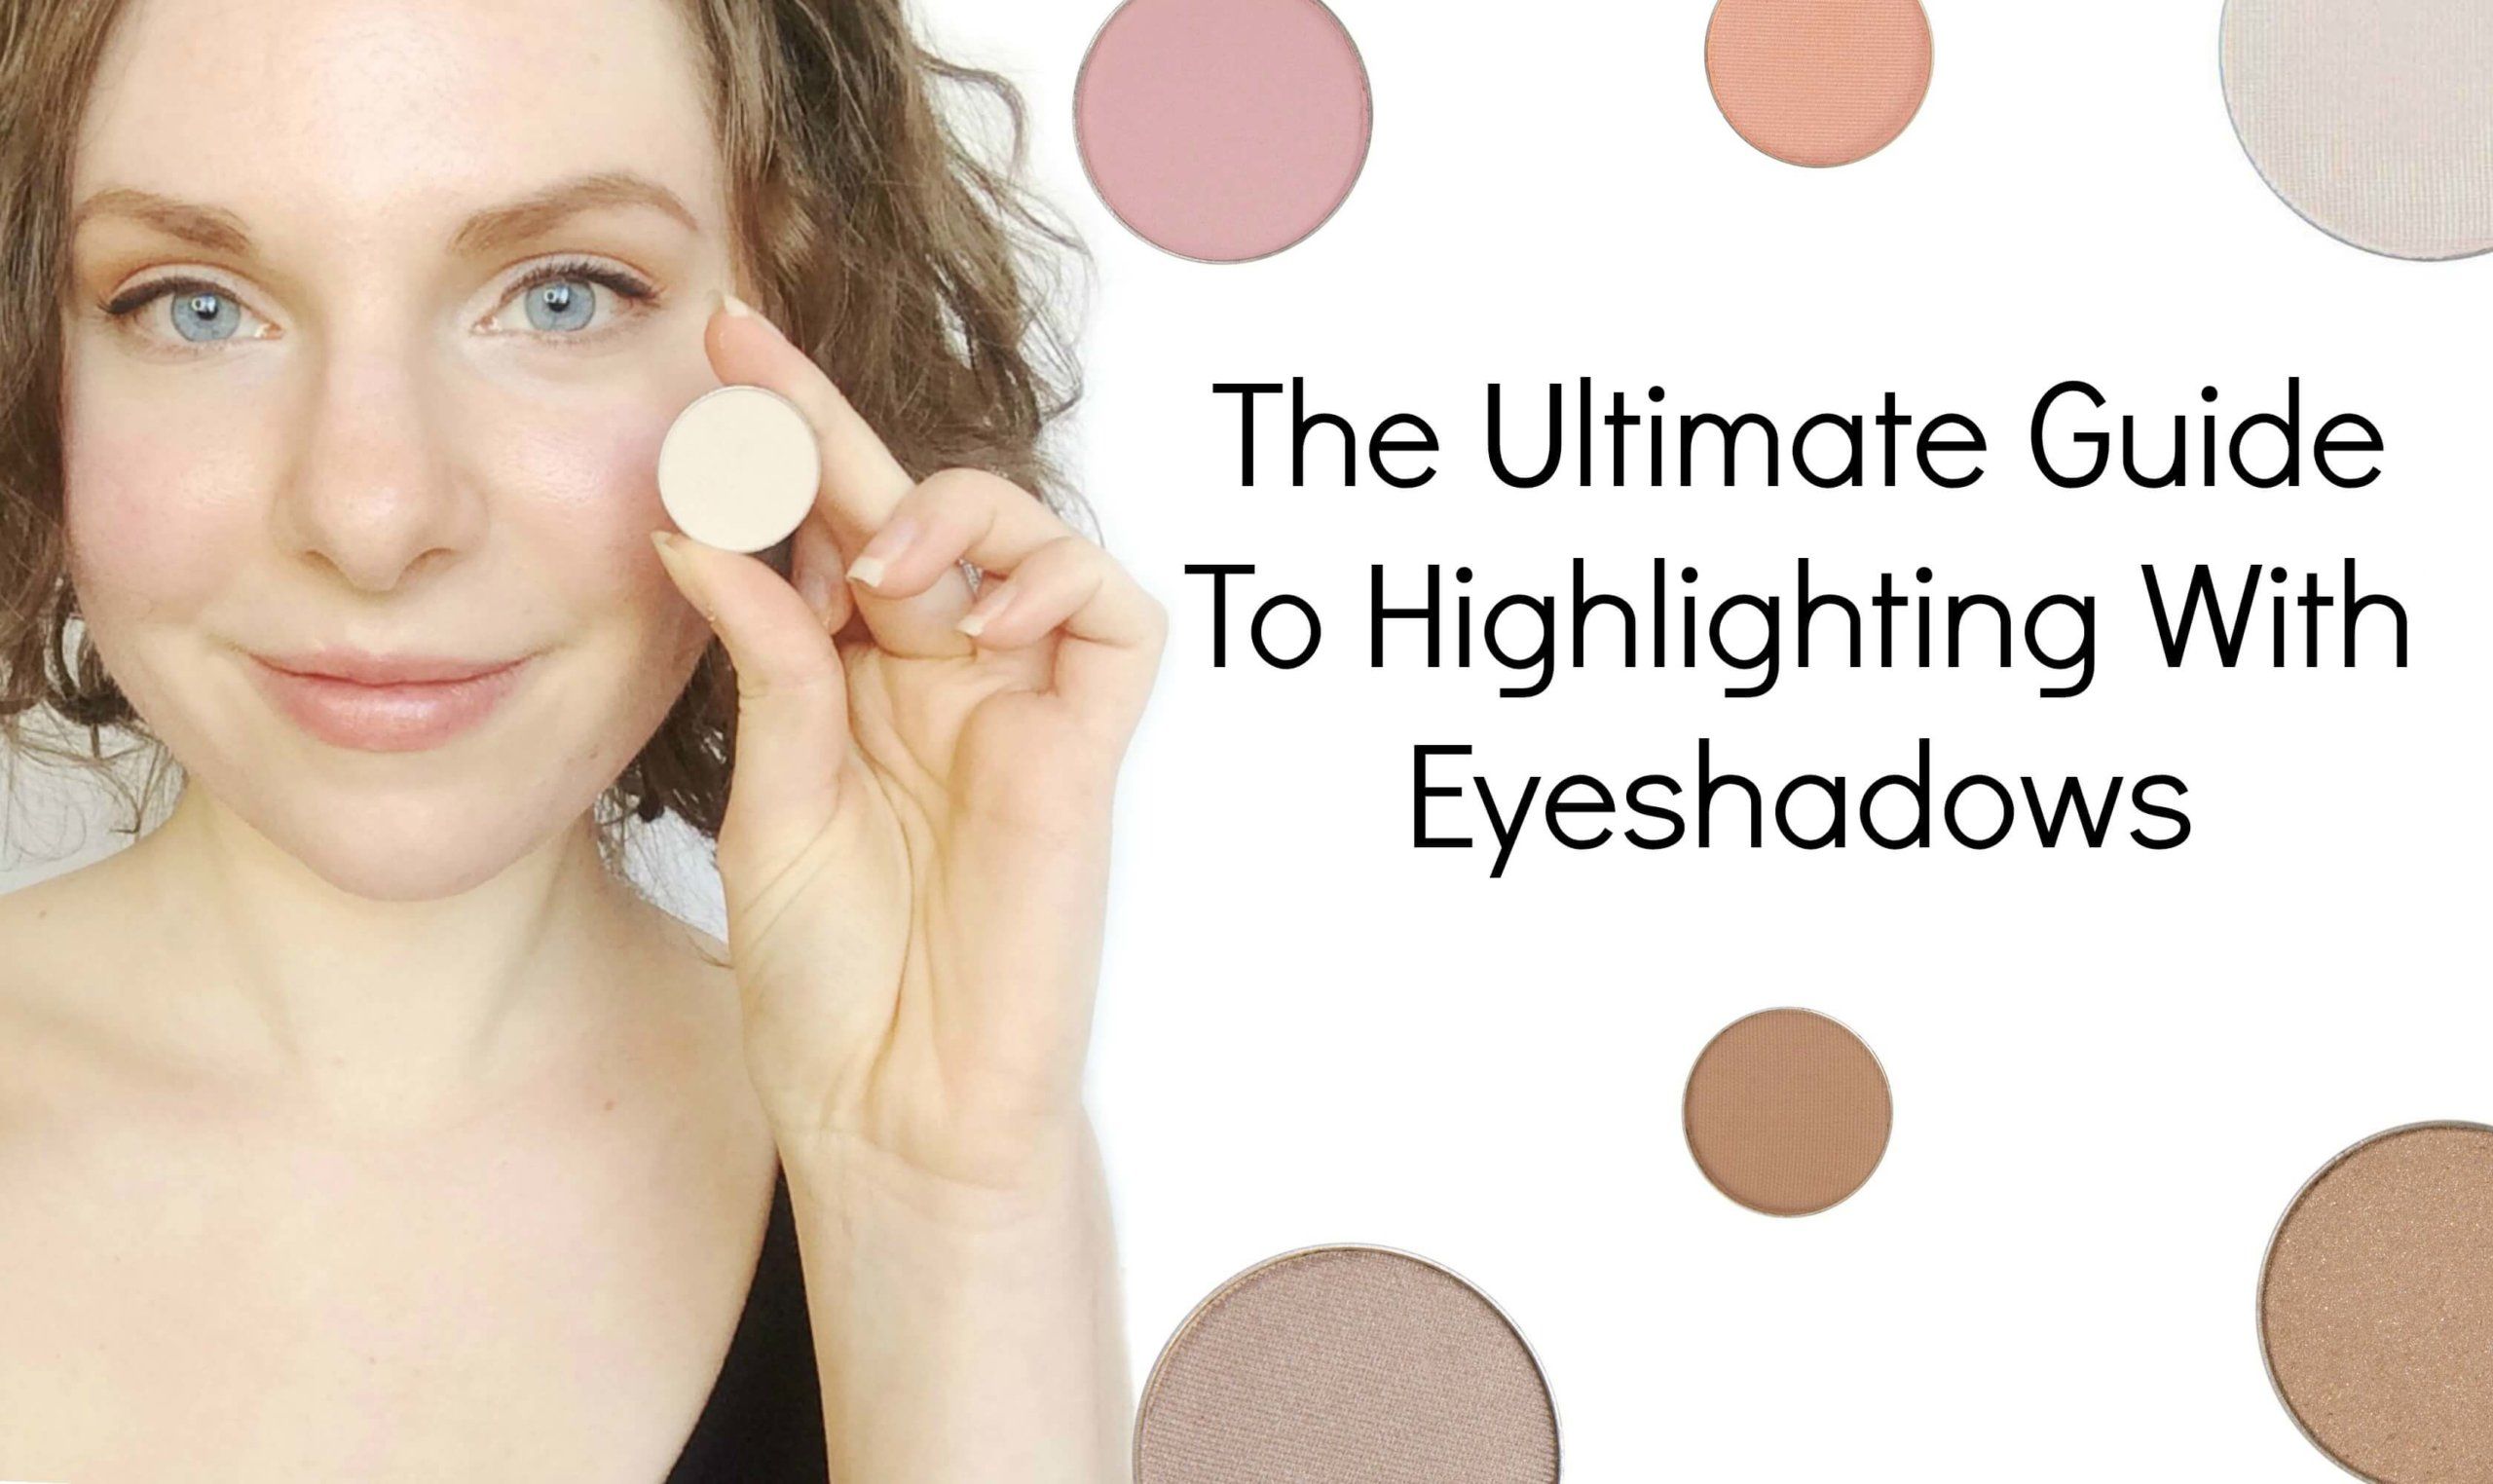
I’ve used my mother as a model here. She has hooded eyelids now so it’s really important for her to use lighter shadows on the lid to avoid extra shadowing or darkness….enter the magical powers of highlighting! For her I used Porcelain all over the lid and even under the lid along her lower lash line to cancel out some of the purple tones. Then I applied Buttercream to the inner third part of her eyelids. I then added Iced Mocha all over the lid and just a tad on the brow bone. I’ve also defined her brows with Yes You Canyon, applied The Lash Project Mascara and put a little Magic Momint gloss on her lips. I love how the gloss just enhanced her natural lip color! I might have her start trying to line her upper water line (tight lining) instead because you will notice here how with the hooded eyes plus lining the upper lash line has added darkness
to the lid. When you have hooded eyes like this you are losing eyelid space, so you need that area to be as light and bright as possible. You’d still want definition to your lash line and lashes so tight lining is a great way to be sneaky about it. Got off topic there so let’s get back to the subject at hand.
![]()

What Areas of Your Face do You Highlight?
Everyone wants to look his/her best. One of the best and easiest ways to get that facial glow is to highlight areas of your face. So, which areas are best? Here’s an easy 3-step process to highlighting that will not only brighten your face, but it can make it appear slimmer as well.
If you’d like to look more refreshed like celebrities and models, you’re going to love highlighting. Highlighting is used to direct eyes to specific areas of your face. You can actually highlight your face with one of three products: cream, liquid, or powder.
The secret is to target three points on your face:
(1) down the center of your nose
(2) top of your forehead
(3) the area right above your lip, which is also known as Cupid’s bow.
This makes your face appear thinner by drawing attention into one line down your face, giving the illusion of a thinner, more contoured face.
One of the best and easiest ways to get that facial glow is to highlight areas of your face.

What Does Highlighting do to Your Face?
We’ve talked a little about what highlighting is. But what does it actually do? When applied in the right places, highlighting can actually make you appear more youthful, creating the illusion of glowing skin. Additionally, makeup highlighters emphasize certain facial features like cheekbones, while downplaying others such as a wide nose. However, if not used correctly, highlighting can make you look washed out, making your entire face appear illuminated.
What are the High Points of Your Face?
The goal of highlighting is to not only give your face a beautiful, natural glow, but you can make certain facial features stand out. The high points of your face that will be emphasized, if done correctly, include the following: your temples, brow bones, cheekbones, apples of your cheeks, bridge of your nose, jawbone, and your Cupid’s bow.

What are the Hollows of Your Cheeks?
Most body parts are easy to locate, however, if you don’t have prominent cheekbones, you
may have a more difficult time locating them. It’s important to your beauty routine to know where your cheekbones are and how to highlight them.
Follow the steps below to find the hollows of your cheeks and highlight your cheekbones.
Step 1: Your cheekbones run from the outside corner of your mouth (fleshy part of your cheek) to your earlobe.
Step 2: Lightly suck in your cheeks or use your finger to find the bottom edge of your cheeks.
Step 3: The hollows that form are the hollows of your cheeks.
Step 4: Blush should be applied to the apples of your cheeks. Bronzer goes in the hollows of your cheeks. To highlight, apply a highlighter to the top of the cheekbones. Lastly, if you choose to use contour, it should go underneath your cheekbones
![]()

Highlighting Your Eyes:
There are two main areas of your eyes that you’ll highlight; the Inner Corner and Brow Bone.
Inner Corner:
Highlighting from the inner corner to a third of the way on your eyelid instantly makes your eyes look bigger, creating a more open appearance to the eye. Doing this will make your eyes look fresher, and more awake so you can take on the day (or night) ahead!
Brow Bone:
Adding a highlight to the brow bone will give your eyes a lifted appearance by drawing the attention upward. While you can totally use the same shadow you used on the inner corner of your eye, choosing a matte eyeshadow that’s a shade or two lighter than your natural skin tone will illuminate the eye area in a more natural way. That being said any eyeshadow that’s lighter is going to help brighten the area you apply it to.
![]()

How to Choose a Highlighting Color:
1. Day vs. Night:
For an everyday or more natural look you might consider using a matte shadow that is just a shade or two lighter than your skin color. If it’s daytime and you want something slightly amped up for special occasions such as weddings or events; try using a shimmer shadow in the inner corner and matte on the brow bone. For nights and getting glammed up you can go all out with a shimmering shadow.
2. Finish:
You’ll want to consider finish as well. Highlighting shadows can be either matte, shimmer/glitter or pearlescent.
Matte: Mattes are great for anyone at any age and will very subtly give you that brighter, awake look in a more natural everyday sort of way.
Shimmer/Glitter: There’s varying degrees of shimmery shadows. Some shimmer can give you a nice sheen or glow which is fabulous for special occasions! While shadows with a larger amount of shimmer or even glitter is best saved for an evening out or glamming it up! Most of our shadows have a very subtle shimmer to them making them much more wearable than glitter shadows.
Pearlescent: Eyeshadows that are pearlescent are GORGEOUS! They create a flawless, effervescent glow to wherever you apply them. They also glide on smoothly providing you with a satiny look and feel. There’s no obvious chunks of shimmer or glitter in these types of shadows because the minerals have been milled to a super fine powder making them extremely wearable for all occasions.
3. Skin Color:
Just like in our brown eyeshadow guide we’re not talking about skin tone here; instead think about skin color. Are you light, medium or dark? Light skinned gals will go for softer more muted shadows maybe something with a slight yellow or pink undertone and on the cooler side vs warm. Medium skinned ladies can opt for warmer shades and same goes for Darker skinned beauties. I LOVE golden or peachy shades on gals who have darker or medium skin.
Light – Porcelain, Pixie Dust or Iced Mocha
Medium – Sand Castle, Beachy Keen or Like U Latte
Dark – Golden Girl, Champagne or Golden Ticket
4. Eye Color
I wouldn’t say this is the MOST important thing to consider but choosing a highlight shadow that goes well with not only the other shadows you are using but your eye color as well; will just help the overall look be more cohesive.
Blue Eyes – Iced Mocha, Sand Castle and Silver Lining
Green/Hazel Eyes – Sand Castle, Beachy Keen and En Pointe
Brown Eyes – Golden Girl, Golden Ticket and Champagne
![]()
Bonus Material:
Use Eyeshadow to Highlight Other Facial Features:
Highlight other areas of your face by using a highlighting eyeshadow in a peach, coral, beige or white color. Areas most people like to highlight would be the upper cheek bone, bridge of nose, and cupids bow. Shadows with a slight shimmer or pearlescent finish work best on the cheek bones and cupids bow while you may prefer a more matte shadow a few shades lighter than your skin color to highlight the bridge of your nose or other areas of your face. The key is to illuminate your skin without making yourself look like a disco ball. When you apply foundation and/or use concealer, you essentially create a blank canvas, so you’ll want to go back in and add dimension. Doing this creates a very lively and youthful glow to your overall appearance.
 Sherri: “Every girl needs the right highlighter. For me, it’s Pixie Dust. I have blue undertones on my eyelids, so the pink tone of Pixie Dust as an all over lid base color, as the highlighter up to my brows and to highlight my inner eye. I then used Champagne as my second all over lid color. For my crease I used Brownie Points and Twinkle Taupe. I’ve also used Black Magic to line my eyes and create the subtle winged eyeliner look for my version of Audrey Hepburn eyes!”
 Ashley: “I use Porcelain the most as a highlighter and base. I love that it brightens up my eyes and makes me look more awake in a subtle way. If I want a slight shimmer I’ll use Buttercream or Sand Castle. For me anything with a peachy or yellow undertone works best. Even on days where I don’t feel like going all out, I’ll at least apply porcelain or buttercream so I don’t look so tired.”
 Andrea: “My favorites are Innocence for my inner eye and Iced Mocha or Porcelain for my brow bone.”
Highlighting Shadow Swatches:
Below you’ll find pictures and a swatch video of all our lovely highlighter shadows!
Shop All of Our Highlighting Eyeshadows By Clicking Here

Soy Free RAL eyeshadow stunning result collections of Mineral Based eyeshadows from RAL
Thank you so much for taking the time to read this. We hope you found it helpful! Tell us in the comments of this post if you’ve ever highlighted before. If not, will you be trying it?
