

Tired of that same ol' classic black line? Feel like the eyeliner world is just "basic" or "winged"? Honey, think again! There's a whole universe of eyeliner styles waiting for your eyelids. Many you've probably never batted an eye at!
Before we dive into the sassy world of 24 fierce eyeliner styles, let's brush up on our basics.
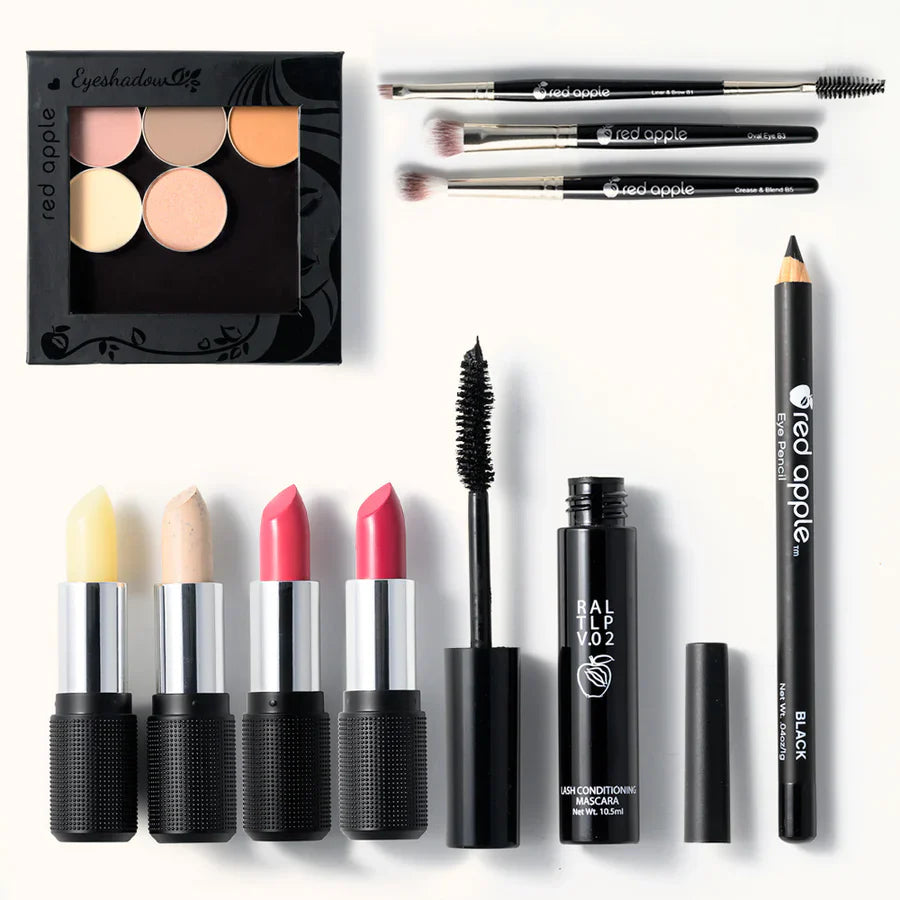
Eyeliner Styles Essentials 101:
- Eye Pencil - The go-to newbie fave! Perfect for soft, natural, everyday glam.
- Eyeshadow - Your trusty sidekick for smudging and smoking out that pencil liner.
- Cream/Gel Eyeliner - For those feeling a bit adventurous. Rich and bold, here we come!
-
Liquid/Felt Tip Liner - The diva of liners. It's tricky but gives that edgy drama once mastered.
And, darling, don’t forget that eyeliner brush! Especially with your pencils, eyeshadows, and gels. - An Angled Eye Brush will be your BFF, trust me.
Starting off? Play with pencils and shadows. Feeling brave? Dabble in gels. And for the diva in you? Liquid liners await.
24 Sassy Eyeliner Styles Awaits!
/wp:kadence/advancedheading wp:paragraph {"fontSize":["","",""]}We're showcasing a fabulous 24! Most are universally flattering, but some do play favorites based on eye shape. No worries – there's a style for everyone, and each promises to make your eyes the showstopper they were born to be! ??️✨
1. The Classic Wing
The classic wing is a timeless look, the perfect go-to look to add some drama to any eye makeup look. This liner extends slightly upward at the outer corners for a subtle lift. Any shape type can pull off this style.
To do a classic winged eyeliner, start by lining the top lash base. Begin towards the inner part of the eye and line along the lash line using small strokes till you get to the outer edge.
Now, add the wing. Look straight ahead into your mirror and draw a straight line from the outer corners of the eyes. Use the outer corner of the lower lash line as your guide to draw that wing at the correct upward angle.
Your wing should be like an extension of your lower lash line. Finish your winged eyeliner by connecting the tip of your wing back to the lash line to smooth it all out.
Any type of eyeliner formula can be used to do this style. However, gel and a black eyeliner pencil will be easier to work with than liquid.
https://youtu.be/xJyx2VZY-Is2. The Bold Wing
This liner is like the classic winged liner, just bolder and thicker. Perfect for creating an even more dramatic effect.
Follow the same steps as mentioned above, just create a thicker liner. For an easier way, first use a black eyeshadow to do your liner. Then trace over it with either a liquid liner or gel liner.
Use an angled eye brush to outline your liner along the lash base and wing with eyeshadow. Then, go back and thicken it. Apply more eyeshadow along the edge of the line you've already made until you have the right thickness but leave the wing tip slightly thinner. Trace over with your choice of gel or liquid eyeliner.
Smaller eyes may want to avoid this style as it may end up making them look even smaller. Hooded eyes should be careful not to make the liner too thick and keep it below the crease.
3. The Double Wing
This style features two wings – one on the upper lash line and one on the lower. It's great for anyone that wants a more elongated eye look. Perfect for those with small or close-set eyes.
Start by doing a classic winged liner on the upper lash. Then do the same on the bottom lash line, just avoid liquid liner for the bottom.
Only line no further than the middle of the lower lash line. Start at the outer edge and work your way in until you reach the middle. Wing your liner by making a flick in an upward stroke at the outer edge. Do not extend it past the top wing.
If using a pencil liner, smooth out your liner with an angled eye brush.
4. The Inverted Wing
For this style, you flip the winged liner upside down. Liner is drawn on the lower lash line rather than on the upper lash line. Eye pencil and/or eyeshadow are best for this style.
Line your lower lash by starting at the outer edge/corner, working your way in towards the inner corner. Then, extend it just beyond the outer corner, in an upward stroke/angle to wing it out.
Take a brush like the Angled Eye Brush and smudge the liner a bit. If using a pencil, take a bit of eyeshadow that is the same color to help smudge it out. To further enhance the look, line the waterline.
This style of liner is a great option for those with hooded eyes. It is more flattering and easier to do for this specific eye shape.
5. The Dotted Eyeliner
Tiny dots are made along the lash line for a unique and less intense liner look. However, it can be done in several different ways.
Some will place 4 dots using a white liner, one on each corner of the eyes, one on the center of the top lash line, and one on the center of the bottom.
Many will line their upper lid like normal and then just place one dot on the center of the bottom lash line. So, you can get creative with this style.
Liquid liner is best for this since it is easier to make dots with. You can use a black color, of course, but you can also play around with just about any color you wish.
6. The Cat Eye
This style extends both the inner and outer corners of the eyes, giving a feline appearance. Liquid eyeliner is the best to use, but gel tends to work well too.
Start with the winged eyeliner steps. Then place your eyeliner just past the inner corner of your eye, and slowly pull the liner towards the outer corner of your lid to connect with the rest.
7. Smokey Eyeliner
Softly smudged eyeliner styles that gives a smoky, sultry effect. You will need an eye pencil and eyeshadow for this one. Black and brown shades are amazing for this style.
Line your upper lash base, getting as close as possible. Work your way from the inner to the outer edge, winging out if you wish. Using a pencil brush or a cotton swap, smudge/blend that out to give a smokey finish. Add some intensity by applying g eyeshadow on top of your line. Gently blend out/smudge.
Any eye type can pull a smokey style, but it will look best on those with almond-shaped eyes.
8. Tightlining
Also known as invisible eyeliner, where the liner is applied to the upper waterline to make the lashes appear fuller. A great way to line the eyes in a more natural-looking way for anyone.
A pencil is best, so choose a color that matches either your lashes or mascara shade. Gently lift the eyelid and apply to the upper waterline, working it into the base of the lashes.
9. Waterline Eyeliner
Eyeliner is applied on the lower waterline to enhance any shape of the eyes. Again, pencil is best. You can even opt for a waterproof formula for the waterline. You may use any color, but a nude shade is best for the lower waterline.
Start by gently pulling your lower lid down using your ring finger. To prevent smudging, use a clean cotton swab to remove moisture from the waterline. Now apply the liner, swiping on until you have the intensity you want.
10. Grunge Eyeliner
Smudged and slightly messy, lived-in, eyeliner that gives a rock-chic, edgy vibe. It's also rather easy to do. If you have small eyes, though, avoid this style to not make them look even smaller.
Line both eyes and waterlines with a black eye pencil. Now completely blend using a smudging brush. Do the same on the lower lid. You can create a wing by flicking it up and out. Apply black eyeshadow on top to fill any gaps and intensify the entire look.
11. Arabic Eyeliner
This bold eyeliner style extends quite far out and up from the outer corner and emphasizes the inner corner. Think of it as a classic cat eye with an added bottom lash line that connects at the outer end.
Follow the steps for winged eyeliner, stretching the tip of the wing towards the brow bone. Go back and place your eyeliner just past the inner corner of the eye, slowly pulling it back to connect to the rest.
Now line the bottom lash starting in the outer end, connecting it to the wing part. Work your way into the inner part of the lash base, meeting the top line in the inner corners.
You can use a well-sharpened black eye pencil and/or either a gel or liquid eyeliner. Make it easier by first tracing with pencil and then going in with either a liquid or gel formula for the top line. Arabic eyeliner will make eyes appear closer together so it will be very flattering for anyone with wide-set eyes.
12. The Doe-Eye
Eyeliner that is thicker in the middle of the eyelid to create a doe-eyed effect. Eyes look wide and rounded, giving the illusion of bigger eyes.
Start with an eye pencil. Line the eyes, with a thin line, starting in the inner corners and working your way to the outer edge. Bring the ends down slightly instead of upwards, but don't extend too far down. Go back in and thicken the line a bit just in the middle area.
You can now intensify or define your line even more by going over it with liquid eyeliner. To make the eyes pop even more, apply white eyeliner to the lower waterline.
13. The Puppy Eye
Eyeliner is drawn downward at the outer corners to mimic the innocent look of puppy eyes.
Using either a gel or pencil liner, apply starting in the inner part and going in a downward curve. Let the natural curvature of your eyes guide you.
With a pencil, you will want to line the bottom lash base, connecting at the outer edge. Carry your line only to the center of the lash base. Gently blend out for a soft, slightly smokey effect.
Puppy eyeliner compliments all eyes. However, it is especially flattering for those with deep-set and hooded eyes.
14. Drop Eyeliner
Like puppy eye, but with a small line extending down from the outer corner.
Follow the same steps for puppy eyes. Simply just extend the line downward at the outer edge without extending too far down.
If you have downturned eyes, avoid this style along with puppy eyes if you do not want to accentuate your natural downturned shape.
15. Natural Lash Eyeliner
A thin liner that closely follows the lash line for a natural look.
You will need an eye pencil or eye shadow for this eyeliner style. Line the eyes as closely as possible to the lash base, using small strokes to line in a very thin line. Do not go all the way to the inner corners, stop just a bit over the middle of the eye.
If you apply a little too much, simply dampen the tip of a cotton swab to clean any excess product.
16. Cut Crease Eyeliner
Bold liner that follows and accentuates the crease of the eye for a dramatic look. Perfect for any eye type that has a visible crease.
First, do a classic winged eye. Then, using either gel or liquid eyeliner, line along your natural crease. Make sure to follow the crease's natural curvature. You can either have it meet and connect to your wing or leave them separated.
17. Floating Crease Eyeliner
Very much like a cut crease eyeliner, except for the line is drawn above the crease creating an illusion of a “floating” liner. This style will be particularly flattering for those with hooded eyes.
Using either gel or liquid eyeliner, line just above your natural eye crease. Try to follow the natural curve of your lash base.
Wear this graphic liner alone or pair it with a cat eye or a classic winged eyeliner look.
18. Egyptian Eyeliner
Thick, bold liner that covers both the upper and lower lash lines and extends beyond the corners of the eyes. Very similar to the Arabic style but with some slight differences.
Begin by creating a winged eye with black liner but stretch the tip of your wing towards the tip of the brow. Extend past the inner corner of the eye, to the edge of the nose, and slowly take it back to connect to the rest of the line.
Line the bottom waterline with a black pencil. Then line the bottom lash base with black eyeshadow starting in the inner part, connecting at the edge of the nose. Work your way out to the outer edge, meeting at the wing.
19. Glitter Eyeliner
Eyeliner with a layer of glitter for an added sparkly effect. Great on just about any eye type that wants an added pop.
Start by doing a winged eye, or cat eye. Then apply a glitter liner directly on top or at the very edge of your line.
20. Graphic Eyeliner
Creative and bold styles that extend beyond the typical regions where eyeliner is applied. There are so many ways to do graphic eyeliner, use your creative side for this one or simply search for some ideas. The cut crease, floating crease, as well as outline wing styles are a few examples.
21. Colored Eyeliner
Using a liner in any color other than black or brown to add a pop of color. You can do any of these styles mentioned in any colored liner. Green eyeliner, blue eyeliner, red, hot pink- you name it.
22. Split Eyeliner
A small gap is left in the liner at the outer corner, creating a “split” wing effect.
Follow the steps to create a classic winged line. Now go back in and create another small thin line from the outer corner just slightly below the wing tip. This line should be connected to the main line but having a small gap between it and the first wing tip, giving the look of a split wing.
23. Under- Eye Eyeliner
Only the lower lash line is lined, leaving the upper lash line bare.
Follow the same steps as the inverted wing style but without extending much beyond the outer edge.
Anyone can wear eyeliner on the bottom lid. Just make sure to keep it thin and as close as possible to the lash base. This style makes an excellent choice for those with hooded eyes and mono lids.
24. The Outline Wing
The wing is outlined with eyeliner and left empty on the inside. You are essentially creating an outline of a wing without filling it in. This style can also be described as a negative space eyeliner. Best done with either a gel or liquid formula.
Begin by lining with a thin line along the lash base. Outline the wing at the outer edge part. Draw another line just above that's connected at the very tip of your wing line, dragging it back to connect to the line on the lash base. It will look as if you've almost created a triangle shape.
Common Mistakes & Solutions
Mastering new eyeliner styles can be tricky, even for makeup mavens. So don’t worry if you do not get it perfectly right away, hardly anyone does.
Perfecting this craft requires — and trust us on this — oodles of practice. And if you slip up? No sweat! Fixes are often easy-peasy.
Let's dive into some eyeliner faux pas we've all been guilty of. ?✍️
- Not lining along the entire lash baseline and leaving gaps- always apply your liner as close as possible to the base of the lashes. Then tightline by gently lifting the lashes upwards to fill any gaps from underneath.
- Uneven Wings- dot on your liner first as a guide and then fill in or apply clear tape at the angle you want your wing to serve as your guide.
- Uneven/jagged or harsh-looking liner- don’t stretch the lid to apply, once you let go the skin contracts and the eyeliner will not look straight or even. Try looking down into a mirror instead, while pointing your chin up to get smooth, streak-free, lines.
- Overlining the lower lash line- heavily lining the lower lash line can make the eyes look droopy and small. It can also increase the chances of streaking. Stick to thinner lines for bottom-lash eyeliner.
- Smudging- apply eye primer first. Eye primer is not just for eyeshadow, it will also help eyeliner stay in place. If using a pencil liner, top it with eyeshadow to help set it.
Helpful Tips & Tricks For Trying New Eyeliner Styles
Avoid waterproof formulas. They are hard to remove so if you make any mistakes, it will be hard to fix them.
Don’t use liquid liner on the bottom lash line. It’s too harsh looking, stick with pencil or eyeshadow.
Keep Q-tip swabs and makeup remover on hand. They will come in handy in helping clean up lines and removing any mistakes.
Make sure your pencil liners are sharp. Dull pencils will not give you smooth lines.
Good lighting is key. Make sure you have enough lighting so that you see clearly where you are placing your product.
Choose the right formula. For softer, smokey, everyday, or more natural styles, go for eye pencils and eyeshadows. If you want more precise, intense, and dramatic, or more edgy styles, gels and liquids are best.

Don’t be afraid to experiment and try some of these different styles and techniques. Just remember, the eyeliner style should not only match your skill level, but most importantly, it should complement your eye shape as well as the look you’re trying to achieve. Happy experimenting!
Let us know which of these styles you are looking forward to trying out or which you have already done so. Which are your favorites? Let us know all your thoughts or if you have any questions in the comments below.
Frequently Asked Questions:
/wp:kadence/advancedheading wp:heading {"level":3}What are the different eyeliner styles?
There are A LOT of different styles these days. We highlight 24 of them in this article, so make sure to read it to learn what those are!
How do you apply eyeliner to mature eyes?
Mature eyes will look best with more simple and natural-looking styles. Avoid any styles that are too dark and heavy as they can weigh maturing eyes down, making them look tired and smaller looking. Also, avoid lining the bottom lash base for the same reason.
What is the best eyeliner style to make your eyes look bigger?
The best styles for making the eyes look bigger are the classic wing and the doe eye.