
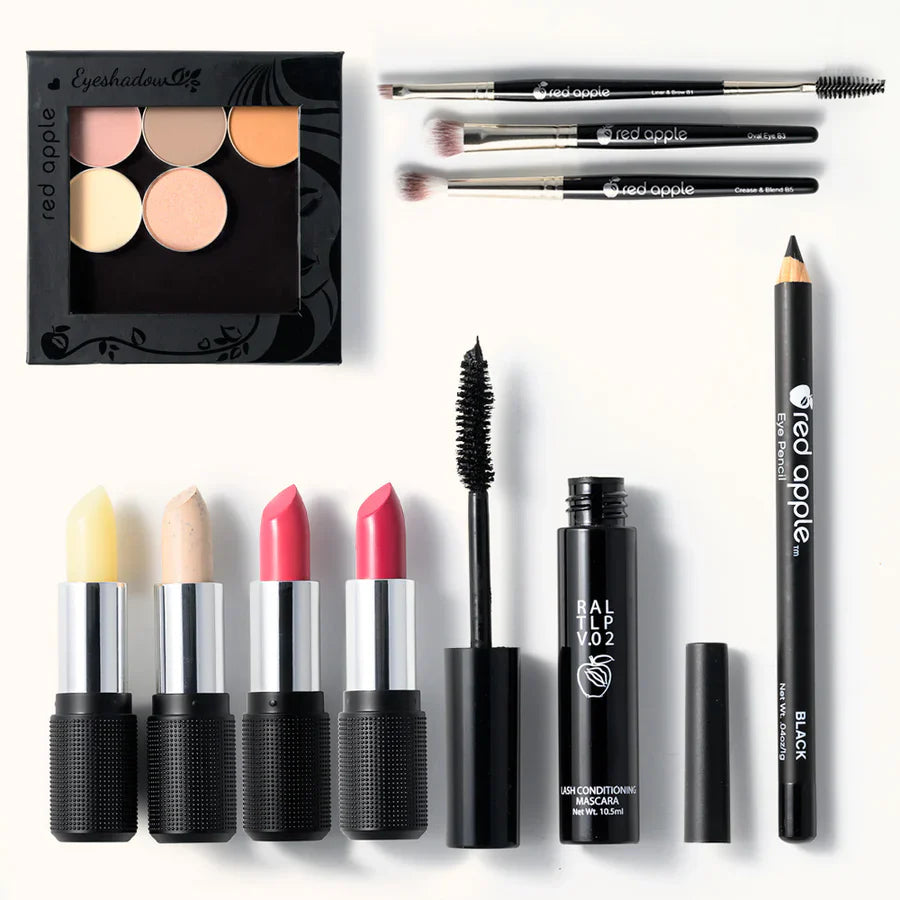

Red Apple has designed two eyeshadow palettes for brown eyes so that you don't have to guess which eyeshadows are best for brown eyes. In this step-by-step eyeshadow for brown eyes tutorial, we will be using Red Apple Lipstick’s Shimmer Palette for Brown Eyes to do a soft halo effect eyeshadow look.
What Is Halo Effect Eyeshadow?
This technique has you apply a darker eyeshadow to the inner and outer corners of the lid, and a lighter (usually shimmery shade) eyeshadow in the center of the lids creating a halo effect around the eyes. This gives the illusion of larger, bigger eyes.
What Color Eyeshadow Is Best For Brown Eyes?
The short answer to this is, brown eyeshadow in lighter and darker shades than your iris. This brings out the richness in your brown eyes. So, think neutrals in the shades: bone, bronze, chocolate, espresso, soft brown, tan. Those are the absolute best eyeshadows for brown eyes that will look universally flattering and bring out your eyes. But if you'd like to dive a little deeper, check out this article for how to enhance different hues within your brown eyes (like mahogany or gold).

We'll be using the shimmer palette for brown eyes in this eyeshadow for brown eyes tutorial. It's both soft enough for daytime but can be worn bold for evening. Let's dive in...
Shimmer Eyeshadow for Brown Eyes-Step by Step Tutorial
Step 1- Prime and Base Color
As always, you want to start by priming the lids using the Prime Time Eye Shadow Primer. Use a tiny amount and let it dry for about a minute or two, you can go ahead and fill in your brows while you wait if this is part of your makeup routine. If you need help with filling your brows, check out Andrea’s tips! Once the primer has dried, because my lids can get quite oily, I like to take the extra step of setting it with a little bit of setting powder but this is optional. Now you want to apply a base color using the lightest eyeshadow in the palette. Using a brush like the Vegan Wet/Dry Eye Brush, apply Buttercream eyeshadow all over the lids up to the brow bone.


Step 2- Bronze Bombshell
Next, using a brush like the Vegan Crease & Blend Brush, apply Bronze Bombshell eyeshadow to the inner third as well as the outer third of the lids (aka inner and outer corners).


Step 3- Yes You Canyon
Using again the Vegan Crease & Blend Brush, you want to use Yes You Canyon eyeshadow to blend out the edges of Bronze Bombshell, blending Yes You Canyon in the crease going a little bit above it. Once you have blended that out, you can go back and darken the inner and outer corners again with Bronze Bombshell.


Step 4- Sand Castle
You now want to use the Vegan Wet/Dry Eye Brush to apply Sand Castle Eyeshadow to the center of the lid, the middle third. Pack the eyeshadow on slightly blending into Bronze Bombshell. You can always blend the edges again using a little bit of Yes You Canyon eyeshadow with the Crease & Blend brush if you need to.


Step 5- Lower Lash Line & Highlight
Don’t forget about your lower lash line, you want to apply Yes You Canyon eyeshadow and blend across the entire lower lash line. Once you do that, you want to apply a bit of Buttercream eyeshadow to the tear duct area as a highlight and again on the brow bone.

Step 6- Liner & Mascara
Line the eyes using RAL Black Eyeliner Pencil. I like to gently draw a line across the lash line and then use the Vegan Angled Eye Brush to smooth and wing it out. You can always apply more to darken it if you need to. And of course The Lash Project Mascara for a natural, feathery finish.


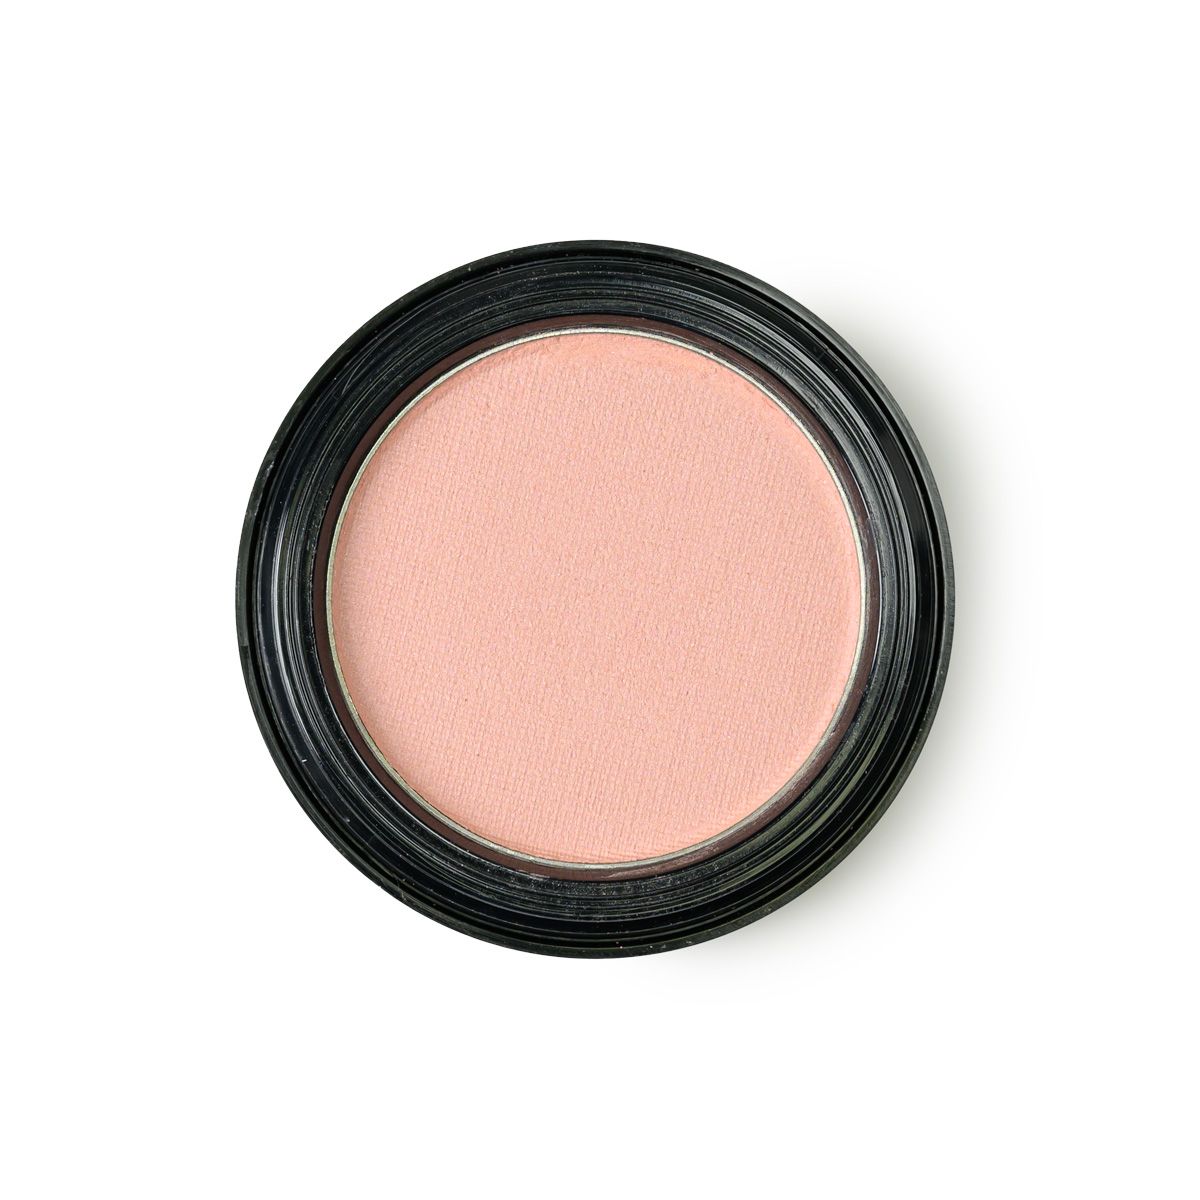
Step 7- Complete The Look - Blush & Bronzer
To complete the entire look, I also used a few more RAL products. After applying my base, consisting of a tinted moisturizer and concealer, I used the Sundrop Bronzer to warm up my complexion a bit. Using the Vegan Blush Brush, I applied it on my forehead, cheekbones, nose, and along the jawline. For my blush, I used Coy blush, a beautiful warm matte apricot pink blush that looks great on people who have warm undertones to their skin tone. This color blush also coordinates well with the eyeshadows we used.
-

Sundrop Bronzer -

Coy Blush -

Step 8: Complete The Look - Lips
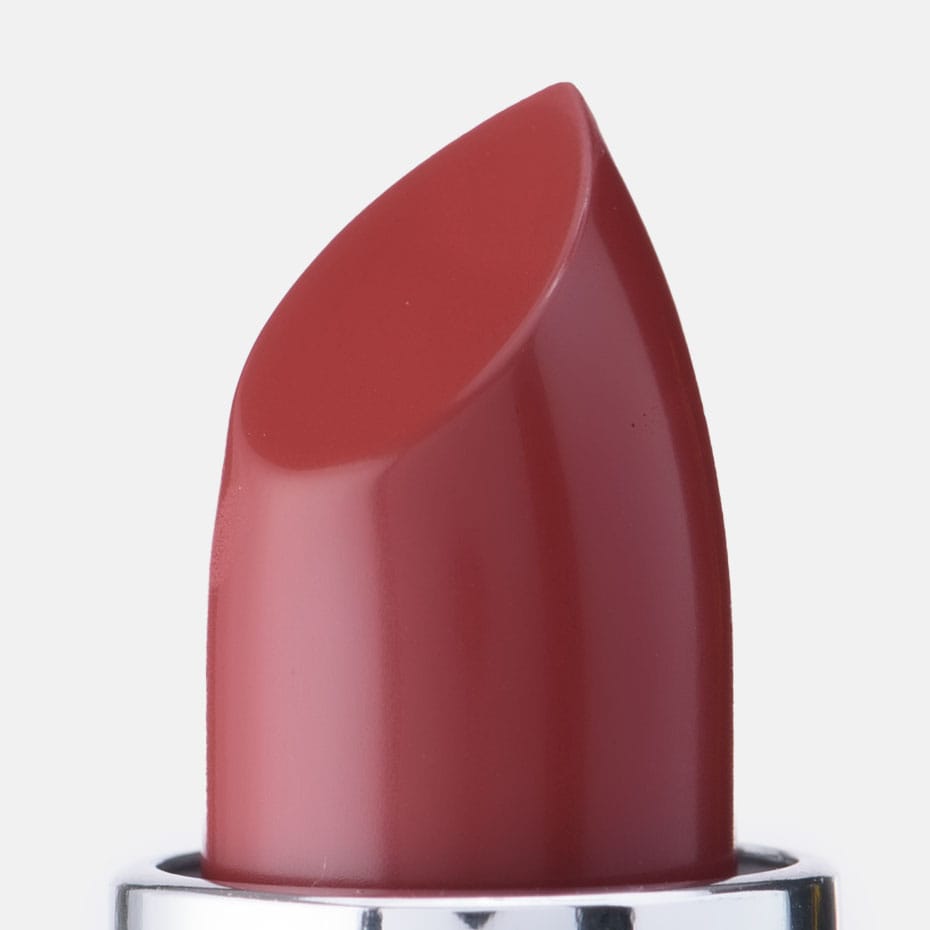
To complete this entire makeup look, I chose to go with a warm red lip for a pop of color. (I first prepped my lips by putting on a coat of the Rallye Balm before I started to apply my makeup.) To line the lips, I used Almost Red lip liner and then went in with Risque lipstick. Risque is a beautiful warm red with orange undertones that looks amazing on those with warm undertones as well as those with neutral undertones. You can use any color lipstick you want of course; it does not have to be a red lip. Any warm or neutral color lipstick, or lip gloss would look great with this look.
-

Rallye Balm -

Almost Red Lip Liner -

Risque Lipstick


Tell us what you think of this eyeshadow for brown eyes tutorial in the comments. Are you a fan of the halo eye technique? Most importantly, what do you think of this gorgeous palette? We hope you like this tutorial and try it out.